Wednesday, December 17, 2008

Exterior Finishes Continued at Pad Site 1


Stonework installed all the way around the lower perimeter of the twin homes.

Workers apply stucco finish to the rear of the structure.


The glass doors seen here will lead from the living room to an outdoor patio.


View from the living room to the dining room.

Module Installation at Pad Site 2


Crane sets the second box atop the foundation as workers measure and adjust placement to ensure proper alignment.


Box one set on the foundation.

Thursday, December 11, 2008

Stitching Modules Together


Door and trim installation will cover the module mate line in the door jamb.


Bathroom with tile finishes before the installation of shower doors.


The top and bottom floors of the separate modules must be joined together. The line on the stair railing shows the separation joint.

Site Grading


After the installation of exterior insulation and vapor barriers, grading covers the exposed foundation.

The foundation remains exposed around the perimeter of the building as work continues.

Safety First!


View of the fire wall in the attic that separates units one and two to prevent fires from spreading.


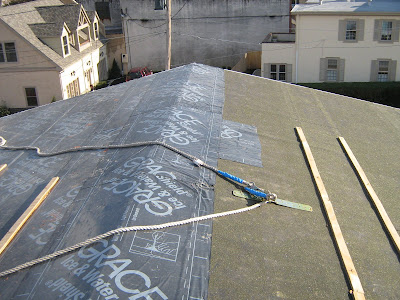
Workers wear harnesses connected to this safety line to prevent falls while working on the roof.

Mechanical Systems


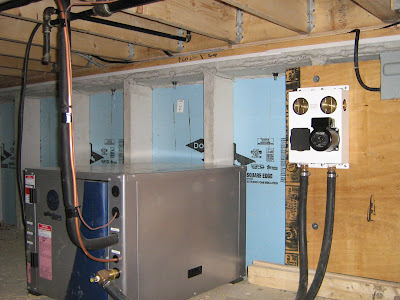
Flow center for ground-source system. Liquid filled pipes run 375 feet underground.

Ground-source water heating and cooling system.

Exterior Finishes


Stucco and Hardie Board will cover the exterior. An alternative to vinyl siding, the fibrous concrete board takes paint very well and is impervious to moisture.


Standing seam metal roof shelters the front entry.


Detail of cultured stone.


Installation of cultured stone water table.


Preparing for roof finishes.


Exterior insulation and vapor barrier and blocking for exterior finishes.


Exterior insulation and vapor barrier installed.

Monday, November 17, 2008

Pad 1 Roof Installation


Front view of Pad Site 1 with roof installed.


Site workers apply finishes.


Crane carefully setting the roof in place.


Crane and site workers ready to position the roof panel.


Crane lifts the roof panel into the air.


Pre-framed roofing material has just arrived on-site.

Wednesday, November 5, 2008

Watch the Video of Module 2

Modular Box 2 Installation


Ready for rigging.


Site workers remove the protective tarp on Module 2.

Watch the Video


Watch the video. It's like being right there, but without the muddy shoes, honking cars, and drizzling rain.

Tuesday, November 4, 2008

Modular Box 1 Installation


Team members Tansy Yamaguchi, Brook Gardner, and Phil King discuss progress.


One down! Light rain necessitated the installation of a protective covering over Module 1.


The first box arrived around 11 am. Site workers removed giant tarps before hooking the box to the crane and hoisting it into the air.

Thursday, October 30, 2008

Preparing the Crawl Space


Several passes with a screed board evens out the pad and knocks down the high spots. Low spots must be filled with fresh concrete and several more passes with the screed board ensures the top is flush. Here workers float the surface to force gravel down and allow excess water and air pockets rise to the top until the slab is smooth.


After the support columns are set, the next step is to prepare the crawl space. The pads are covered with gravel and fine sand and then topped with a layer of plastic. The plastic serves as a vapor barrier and helps prolong the life of the pad. Workers measured and cut steel mesh to the shape of the pad to reinforce the concrete.

Tuesday, October 14, 2008

Foundation Walls for Pads 3 and 4


After the concrete has been poured and set, the columns are attached to a metal plate and a quick-setting grout is applied. The use of leveling grout allows the columns to be positioned properly.


Elevations must be confirmed before the supporting mid-span columns are ready to receive the modules. The large black pipe seen here connects to the sump pump.


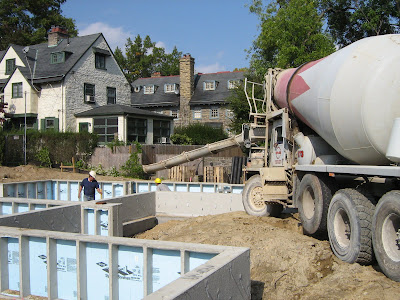
The foundation wall has been set in place and a truck pours concrete for the interior structural piers.


Reinforcing rod sits inside the footing and will be filled with concrete to the top of the pin - exactly 12 inches.


Expect the completed exterior wall to resemble this mock-up.


Site workers cover structural reinforcing pads. The pads provide structural reinforcement for point loads for the building foundation.


Workers check the foundation stone in preparation for the foundation wall to be installed. Two types of aggregate cover the pad site. The darker brown 1A gravel provides tighter contact points along the perimeter of the foundation wall. The lighter colored 2B aggregate sits beneath the poured concrete slabs.

Tuesday, September 30, 2008

Watch Foundation Wall Installation

Green Foundation Walls


Superior Wall's precast foundation wall systems look gray, but are actually very green.

Energy Efficient - A continuous layer of R-12.5 insulation bonds directly with high-strength concrete to minimize heat transfer. The pre-studded wall panels include a cavity for additional insulation to maximize R-value.

Material Conservation - Since the foundation wall panels are engineered and manufactured with insulated concrete studs, less building materials are used.

Better Air Quality - The 5000psi concrete has a lower water-to-cement ratio to increase durability and prevent moisture transfer. That means less mold and fungus.

No On-Site Soil Contamination - Superior Walls are built off-site, eliminating any on-site soil contamination from such materials as the form oil used for poured walls. And because damp-proofing is built in to the walls (ESRs 1553 & 1662), no on site sprays or bituminous coatings are required.

Reduces Job-Site Waste - The foundation arrives on-site ready to install, producing virtually no on-site waste.

September 22: Foundation Prep Complete


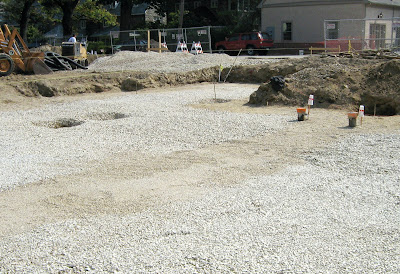
Pad 1 foundation preparation complete! Stone for the Superior Wall foundation has been placed and grade elevations checked. Future pier locations are marked by two square indentations in the ground.

September 19: Foundation Drain


Even though you can't see a building yet, a lot of important work is being done on-site. Here you can see the placement of the foundation drain at Pad 1. By damp proofing or waterproofing the foundation appropriately, installing appropriate foundation drains, and properly backfilling and grading the soil around the site, future moisture problems can be averted.
Monday, September 29, 2008

September 17: Soil Inspection


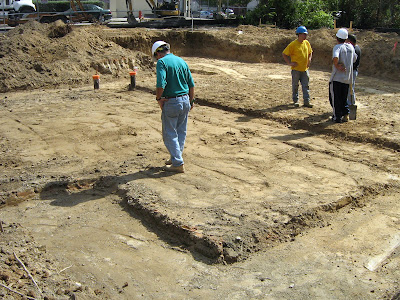
Pad 1 site excavation ended today with a soil inspection. The inspector examined samples from six random bores within the foundation area to verify soil types.

The inspection is required by the city for proper documentation and is an integral part in any new construction project. Soils vary in type, composition and strength, and the differences can be significant. Some soils are very strong and can support significant weight, while other soils are weak and compress under light loads.

September 16: Excavation Discovery


Excavation of Pad 2 unearthed a foundation that was completely buried 6-feet below ground level. "That kind of thing happens sometimes" says Project Manager Scott Kotcamp, "especially in a city that's 200 years old." The foundation was broken up and removed, with a minimal time setback.